Table of Content
INTRODUCTION
Login to the Customer Self-care Interface
Password Recovery
ICONS
CUSTOMER INFORMATION
Company Info
Customer web interface Password Change
Set Balance Warning Threshold
ACCOUNTS
Search for accounts
Account xDRs
MANAGE ACCOUNTS
Account Info
User interface
Subscriber Information
SERVICE FEATURE
Incoming Call - Forward mode
Follow-Me
Advanced Forwarding Mode
Forward to SIP URI
Simple Forwarding
INTRODUCTION
Login to the Customer Self-care Interface
UsVox Support Department will provide you with a URL and credentials for logging to the Customer self-care portal upon finalizing programming your SIP trunk services.
SIP Trunk customers benefit from many feature of Hosted PBX, for feature programming instructions please review System Administration Web Interface Manual
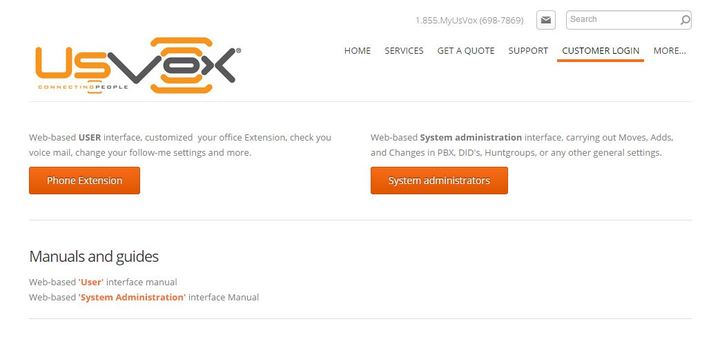
Go to our website: http://www.usvox.com/ and press the tab ‘Login’ ( http://www.usvox.com/customer-login.html )
For Administrator Login, press the 'System administrator' button
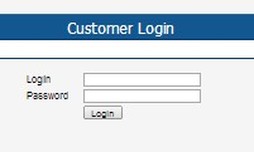
At the login page used the credentials you received from our support department
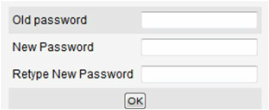
The first time the administrator logs into the system, the portal prompt to change the password.
Password Recovery
If you need to reset your password please press button 'Password Recovery' you must be register to use this feature please ask you system administrator.
Icons
Home (First page)
Customer Info
Accounts
xDR Browser, Reports, and Invoices
Customer Information
Company Info
The customer’s contact information is used to distribute account usage information, call statistics, invoices, and other important information.
- Contact – Name of the customer contact, other than the owner
- Email – An email address for the distribution of accounting information.
- Bcc – Blind carbon copy email; may be used for debug and archiving purposes.
Customer web interface Password Change
- Password- Input the new Password or used the ‘Auto’ button to generate one.
- Web Interface Language – Language to used on the customer self-care web interface
Balance Warning Threshold
Customers can be notified by email when his balance is dangerously close to the credit limit.
Accounts

Hover over the icon and click on the link Accounts
Search for accounts
Press ‘Show Account’ for a full list of customer accounts or type the account number on the filed ‘Account ID’ and press ‘Show Account’.
Account xDRs
This screen allows you to view and download transaction records – xDRs (eXtensible Detail Records) for any desired time period.
|
Set the ‘from / to dates’ by clicking the icon and press the Show xDRs button.
The result page contains a summary displayed at the top of the screen and tables list all calls and accompanying charges during a specified time period. If you want to view information (charged quantity and amounts due) for all of the services, |
Manage account
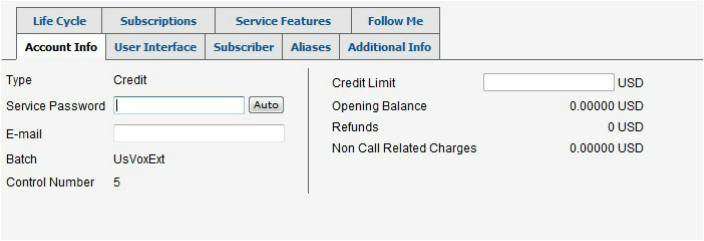
Account Info
- Service Password (VoIP Password) – The account ID and this password will be used to authenticate SIP server login.
- Email – Enter, the account owner’s email address here, If login password is forgotten they can recover using the recovering tool.
User Interface
- Login – Account login to web self-care pages. Can be the same as account ID.
- Password – Password for the web self-care pages.
- Web Interface Language – The language to be used on the customer self-care web interface.
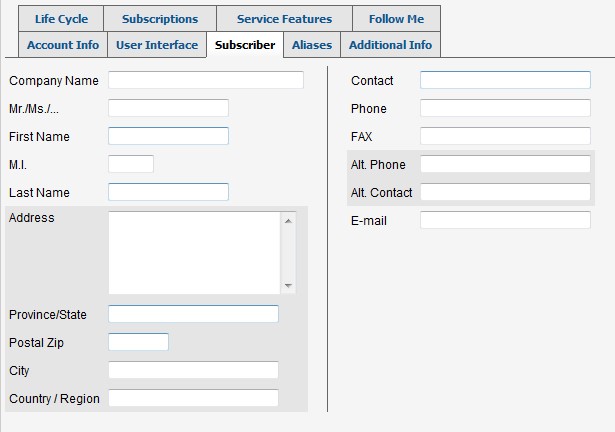
Subscriber Information
- Subscriber Name – First Name and Last Name will be used to show the Account caller ID wend SIP phone device is calling to others.
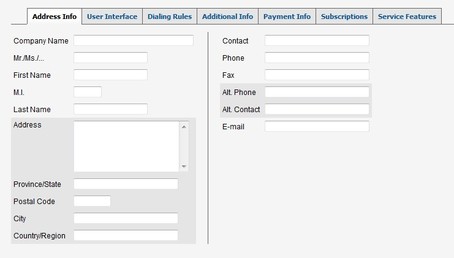
- Address info tab – General information
- Email – General information
Service Features
Incoming Call - Forward mode:
Default Answering Mode, set to: Forward only.
- Follow-Me
- Advanced Forwarding Mode
- Forward to SIP URI
- Simple Forwarding
Default Answering Mode, set to: Forward only.
Fallow Me
Using follow-me you can forward calls to multiple destinations. You can also configure it so that each of these destinations will be used during its own time period.
Press Add in top right of the page (not show in picture)
Press save or save and close in top right of the page (not show in picture)
Press save or save and close in top right of the page (not show in picture)
- Order: Specifies the order for redirecting a call.
- As listed: call every active follow-me number from the first (topmost) number to the last, until the call is answered.
- Simultaneous: call every active follow-me number from the list at the same time until the call is answered.
- Random: use a random order.
- Up, Down: Click these buttons to move a row before the previous one or after the next one in the list.
- Name: Type name, Group name, or any information for the number to be forwarded.
- Destination: Type the abbreviate number (Station), Account number, or the numbers to be forward used 11 digit diling for out bound numbers.
- Timeout, Sec: The time for the device to ring.
- Off: Check this option to temporarily disable forwarding to a follow-me number.
- Advanced Forwarding Mode
This is similar to follow-me mode, but has a few extra options that allow you to route calls to SIP URI. To do this, follow the steps below:
1. Choose Advanced Forwarding.
2. Click Add New Number to add the number on which you wish to receive forwarded calls.
3. Enter the information needed. The fields are very similar to those for adding a follow-me number as described above.
4. Below are additional fields that are not available when adding a follow-me number.
SIP Proxy – Select SIP proxy from the drop-down menu.
· Keep Original CLD – Check this option to ensure that the originally dialed number is present in the call information when forwarding a call to another phone line.
· Calling Party Display – Choose how to display the caller’s info during forwarding:
o Select Caller Number and Name to see the phone number and the name of the original caller.
o If you choose Caller Number and Forwarder Name, then the phone number of the caller and the forwarder’s name will be displayed.
o To see the phone number and the name of the forwarder, select Forwarder Number and Name.
· Transport Protocol – This enables you to choose the UDP or TCP transport protocol. You can use the TCP protocol instead of UDP for SIP communications for PBXes that do not support UDP.
- Forward to SIP URI
This is similar to follow-me and Advanced Forwarding Mode, allow you to route calls to SIP URI. To do this, follow the steps below:
1. Choose Forward to SIP URI
2. Type the account number 'Use Original CLD' and add the IP Address for the IP-PBX on which you wish to receive calls.
3. Timeout, sec, set to 300 seconds.
4. Below are additional fields that are not necessary to change.
· Keep Original CLD – Check this option to ensure that the originally dialed number is present in the call information when forwarding a call to another phone line.
· Calling Party Display – Choose how to display the caller’s info during forwarding:
o Select Caller Number and Name to see the phone number and the name of the original caller.
o If you choose Caller Number and Forwarder Name, then the phone number of the caller and the forwarder’s name will be displayed.
o To see the phone number and the name of the forwarder, select Forwarder Number and Name.
· Limit Simultaneous Calls To
· Transport Protocol – This enables you to choose the UDP or TCP transport protocol. You can use the TCP protocol instead of UDP for SIP communications for PBXes that do not support UDP.
Simple Forwarding
The simplest type of forwarding is when you specify a single phone number to which all calls will be sent, similar to Forward to SIP URI
1. Choose Simple Forwarding.
2. Type the Number to receive forwarded calls.
3. Timeout, sec, set to 300 seconds.
4. Below are additional fields that are not necessary to change.
· Keep Original CLD – Check this option to ensure that the originally dialed number is present in the call information when forwarding a call to another phone line.
· Calling Party Display – Choose how to display the caller’s info during forwarding:
o Select Caller Number and Name to see the phone number and the name of the original caller.
o If you choose Caller Number and Forwarder Name, then the phone number of the caller and the forwarder’s name will be displayed.
o To see the phone number and the name of the forwarder, select Forwarder Number and Name.
· Limit Simultaneous Calls To
5. Click the Save icon.

