UsVox Extension Interface
|
Table of Contents
INTRODUCTION
Login to the Account Self-care Interface
Overview
Common Features
Web Interface Tabs
Dashboard
WebRTC
My Profile tab
IP Centrex Tab
General
Phone Book
Incoming Calls
Forwarding
Call Logs
Voicemail
Mode
Voicemail Menu
External E-mail
Greetings
Mailbox Display Options
Message Display Options
Folder Preferences
Setting voice mail by phone
Faxes
Music on Hold
INTRODUCTION
Login to your Self-care Interface Portal
UsVox or your Hosted PBX Administrator will provide you with credentials for logging in to the Extension self-care portal. They are 3 ways to log in to your extension:
You can reset the password by using the 'Password Recovery' tool located on the top left of the login page. You must have the login name and email register at the extension
- Go to http://www.usvox.com/customer-login.html and press ‘Phone Extension’ button
- Type ‘account.usvox.com’ on you browser address
- Follow this link: https://mybilling.usvox.com:8445/
You can reset the password by using the 'Password Recovery' tool located on the top left of the login page. You must have the login name and email register at the extension
Overview
The Extension Self-care Interface was designed for end-users to access and manage their Hosted PBX Extensions. The Interface is divided into four tabbed sections:
· Dashboard (your home page)
· My Profile
· IP Centrex
· Billing Information
· Dashboard (your home page)
· My Profile
· IP Centrex
· Billing Information
Common Features
Most of the data on the self-care portal is formatted like a page and sorted into columns.
You can go to the next page or the previous page, jump to the first or last page, or use the Refresh icon to update any of the pages.
You can also change the number of columns and sort them in ascending or descending order by clicking your mouse on the name field of any of these columns. If you point your mouse at the name field you will see a triangle; click on it and a drop-down menu will appear. You can choose how to sort your data and add or remove columns by ticking or un-ticking items in the drop-down menu:
Action buttons
The top right hand side of the interface provides you with the following information and actions:
- Your ID and a login name that was used to log in.
- The Logout button that terminates your current session on the web interface. Also, you can change your password here if necessary.
Dashboard
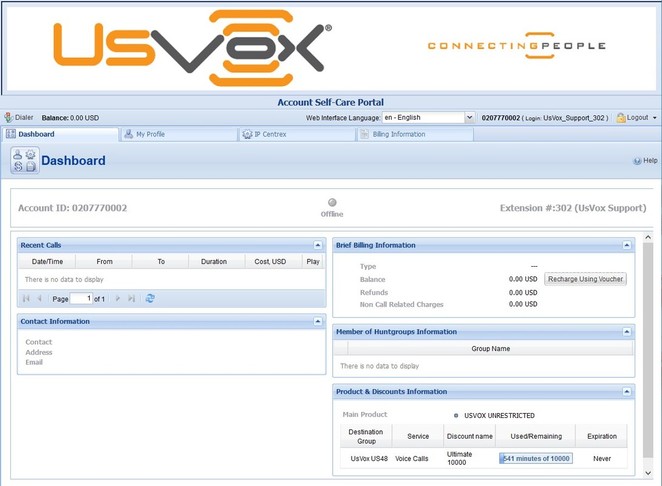
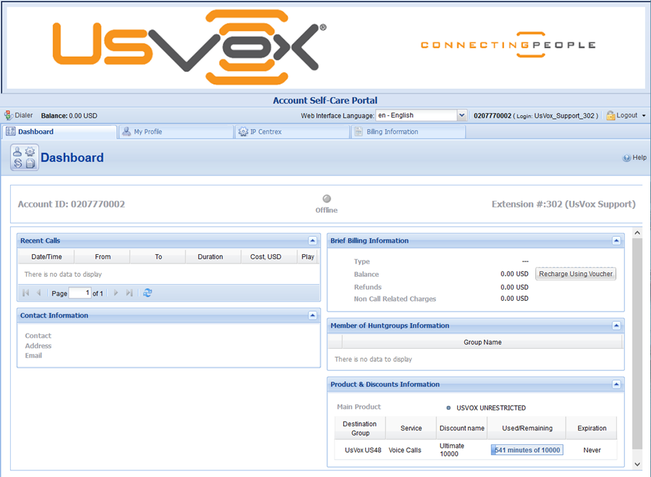
Your home page is organized like a dashboard so that you can easily view the most important information separated by category into different windows. In addition, these windows can be moved round, rearranged, or minimized as you wish. You will see multiple information windows on the Dashboard:
Status - Indicates whether the phone is online or offline at the moment, account number and extension number
Recent Calls - This table lists the most recent calls and call details. It also gives you the ability to listen to recorded calls (if any were recorded).
Brief Billing Information - This reflects thumbnail billing information such as your available funds (or balance), refunds and charges information. Balance information will only be displayed for phone lines, which have an individual balance control.
Contact Information - Here you can view your contact info such as address, email, etc.
Member of Huntgroups - Information This shows whether your extension belongs to any of the huntgroups.
Product & Discount Information - Here you can find all the necessary information concerning your product and available discounts.
WebRTC
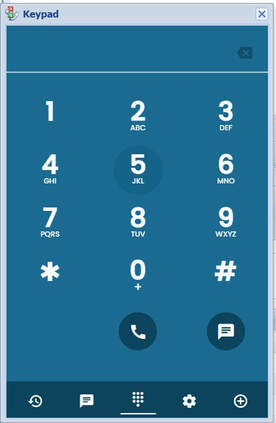
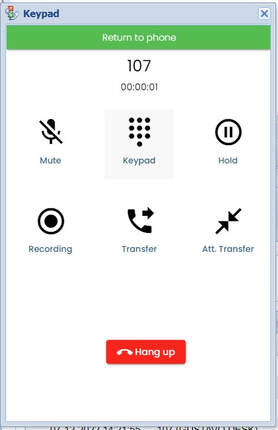
WebRTC (Web Real-Time Communications) is a unique technology that enables you to provide VoIP calling via a web browser, without needing any phone equipment or software applications.
After dialing the number or answering a call you will have access to different features like Mute, Hold, Transfer, Etc.
My Profile tab
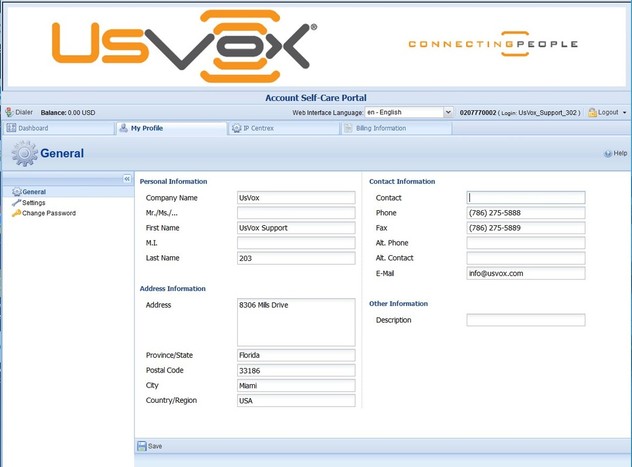
The My Profile tab allows you to view and change your personal details such as contact information, personal info, password, etc.:
General - Here you can enter general information such as company name, address, etc. must important you will set your email address, this will be the one use on the ‘Password Recovery’ link (review Login to the Extension Self-care Interface)
Settings - Here you can choose the language to be used on your self-care web interface.
Change Password - Here you can change your current password for the self-care portal.
Settings - Here you can choose the language to be used on your self-care web interface.
Change Password - Here you can change your current password for the self-care portal.
IP Centrex Tab
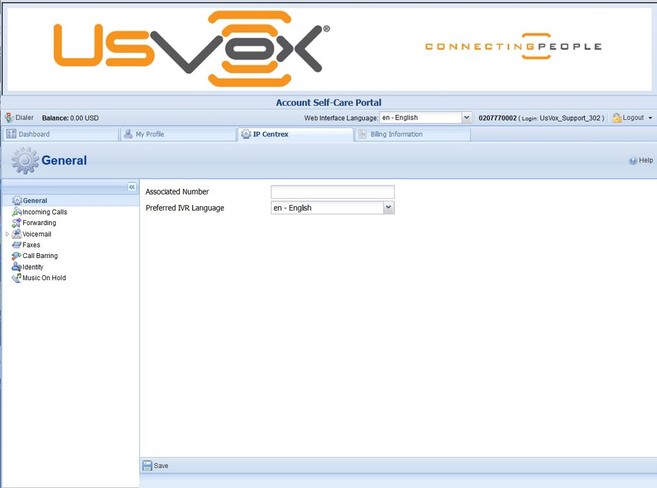
This tab allows you to view your external numbers, and configure call screening, voice mail and other services.
General Field
Associated Number: This field may be used for various purposes depending on the services offered by your provider. Ask your service provider about how to use this particular option.
Preferred IVR Language: Here you can select the language you prefer for interacting with an IVR application.
Preferred IVR Language: Here you can select the language you prefer for interacting with an IVR application.
Phone Book
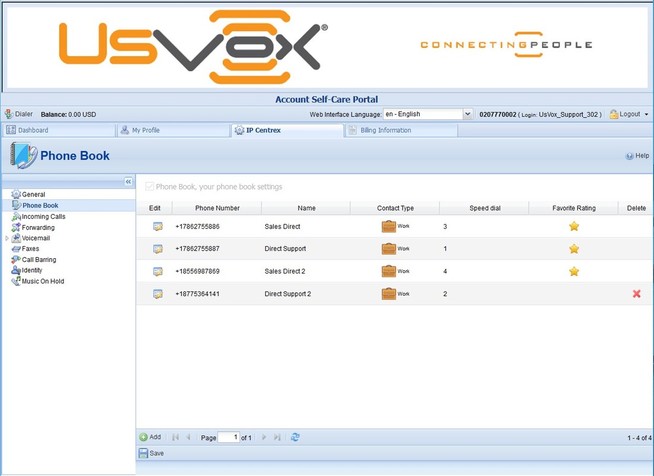
On the Phone book page you can maintain your own set of frequently dialed numbers, assign speed dial codes for them and define a list of favorite numbers.
Note, that this page is only active if your provider has enabled the Phone Book feature for you. Depending on your needs, you may activate / deactivate the Phone Book by selecting or clearing the check-box on the top.
Note, that this page is only active if your provider has enabled the Phone Book feature for you. Depending on your needs, you may activate / deactivate the Phone Book by selecting or clearing the check-box on the top.
- Speed Dial: The Speed Dial option allows you to assign speed dial codes to numbers. Please contact your provider to inquire about the maximum abbreviated dial length.
- Favorite Rating: If your provider makes the Favorite Rating service available, you have the option to mark which numbers will be charged according to a special rate. Ask your provider about the maximum amount of numbers that you can mark as favorite numbers and about the patterns to be used for favorite numbers.
Incoming Calls
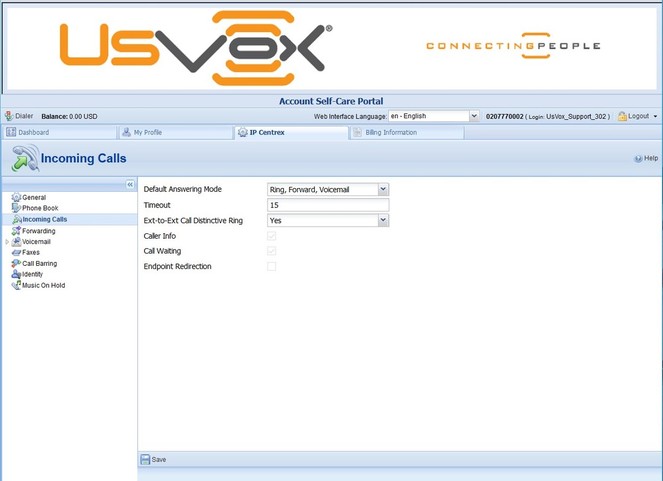
Here you can set the parameters for incoming calls.
- Default Answering Mode: This option specifies the method for processing incoming calls.
- Ext-to-ext Call Distinctive Ring: For incoming calls from phones within the IP Centrex environment, use a ring pattern that is different from the default tone.
- Caller Info: This option displays caller info for incoming calls (set by provider).
- Call Waiting: Indicates the status of the
- Call Waiting: function (set by provider).
- Endpoint Redirection: This allows you to configure call redirection on your SIP phones. Note: if this feature is supported by the SIP phone
Forwarding
Forwarding allows you to redirect all calls to another telephone number: What call forwarding does for you: Eliminates missed calls, Calls can follow you wherever you go, Eliminates waiting for important calls, Enhances home security when you are away.
There are several types of forwarding: Follow-me, Advanced Forwarding, Forward to PBX, Simple Forwarding (The only setting program for extensions is ‘Follow-me’ unless other type is needed to accommodate account services or customer settings, please contact you UsVox rep for details)
There are several types of forwarding: Follow-me, Advanced Forwarding, Forward to PBX, Simple Forwarding (The only setting program for extensions is ‘Follow-me’ unless other type is needed to accommodate account services or customer settings, please contact you UsVox rep for details)
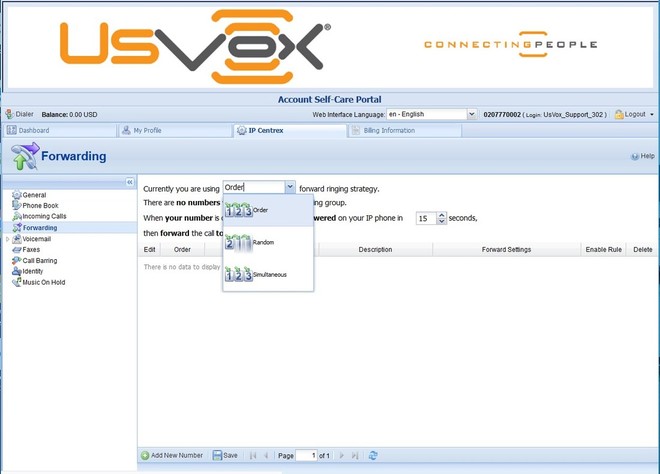
- Follow-me: If the Follow-me option is set for you by your provider you can forward calls to multiple destinations. You can also configure it so that each of these destinations will be used during its own time period.
- In the IP Centrex section, choose Forwarding.
- Select the mode (Order, Random or Simultaneous) for your forwarded calls.
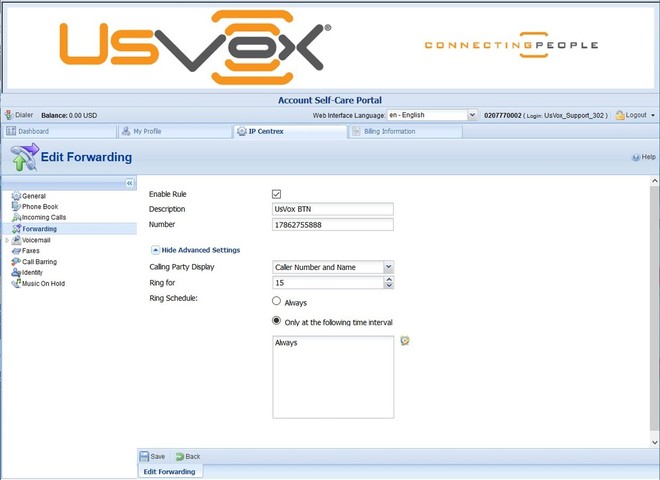
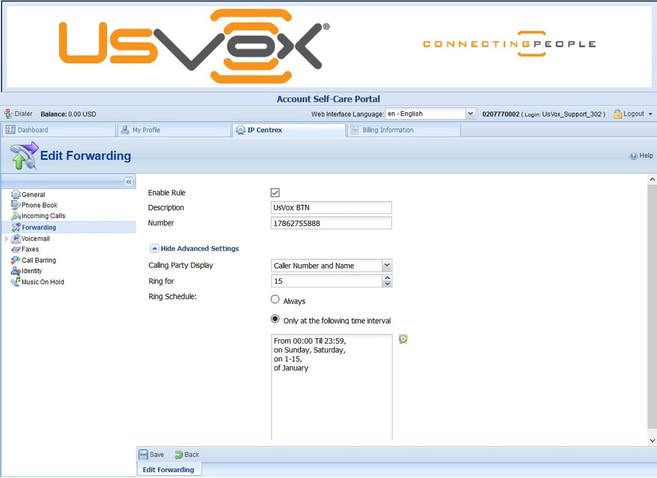
- Enter the following information:
- Description –A short description for this number.
- Number – Enter a number for redirecting calls (e.g. 35644890579).
- Calling Party Display – Choose how to display the caller’s info during forwarding:
- Select Caller Number and Name to see the phone number and the name of the original caller
- If you choose Caller Number and Forwarder Name, then the phone number of the caller and the forwarder’s name will be displayed.
- To see the phone number and the name of the forwarder, select Forwarder Number and Name.
- Ring for – If a call is not answered, set the number of seconds that it will ring for until it is forwarded to the next number on the list.
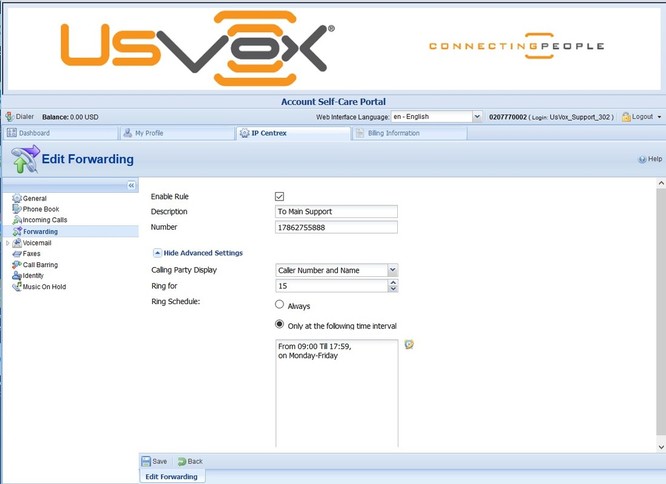
- Ring Schedule – Choose the period during which the number is used.
- If you check the box next to Always, the call will always be forwarded (e.g. to your cell phone).
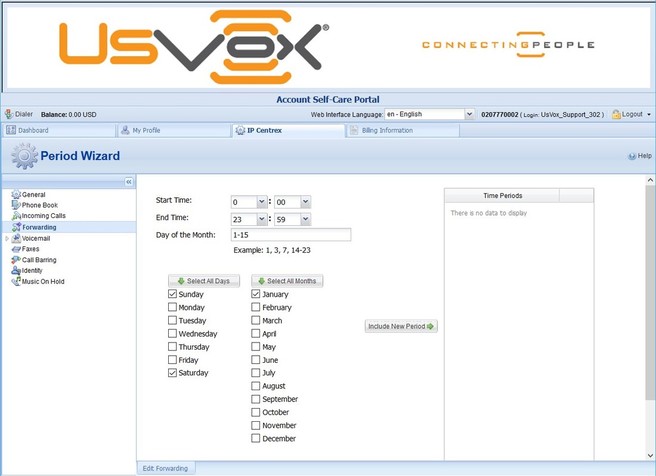
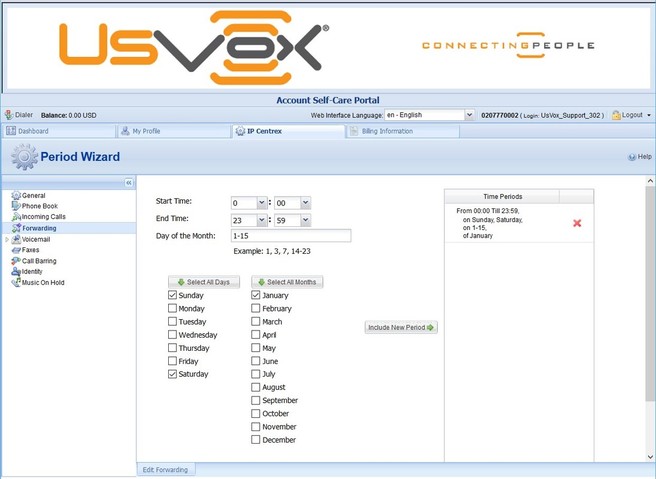
- If you want to forward calls to a cell phone only during a specific time period, check the box next to Only at the following time interval field and click the icon to define that interval.
6. Repeat steps 2-4 until all the desired Follow-me numbers have been added.
Voicemail
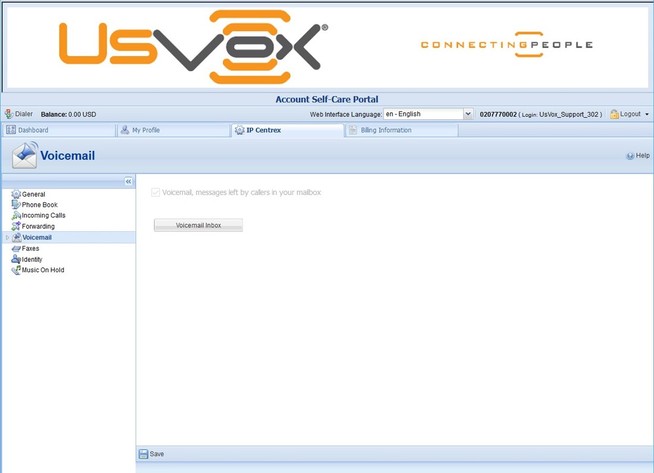
On the page you can configure your voice mailbox and view messages left by callers.
Note: This page is only active if UsVox has enabled the Unified Messaging services for you. In this case it is not predefined.
Once you choose the Voicemail tab you will be prompted to go to the Unified Messaging (UM) Web Interface to check your mailbox.
Note: This page is only active if UsVox has enabled the Unified Messaging services for you. In this case it is not predefined.
Once you choose the Voicemail tab you will be prompted to go to the Unified Messaging (UM) Web Interface to check your mailbox.
You will also find these tabs under Voicemail:
- Mode
- Voice Menu
- External E-mail
- Greetings
- Mailbox Display Options
- Message Display Options
- Folder Preferences
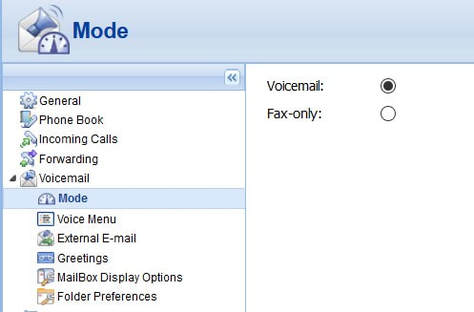
Mode allows you to define the call transfer destination after timeout of an incoming call. It gives you a choice of Voicemail, Fax-only or Auto Attendant (if applicable).
NOTE: The Auto-attendant mode is available only if the Auto-attendant functionality has been provisioned by UsVox for you. In this case it is not predefined.
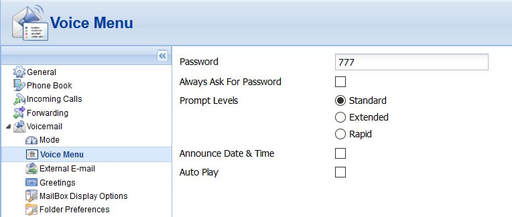
Voice Menu allows you to set options for your mailbox, such as:
- Password
- Always Ask for Password
- Prompt Levels (Standard, Extended, Rapid)
- Announce Date & Time
- Auto Play
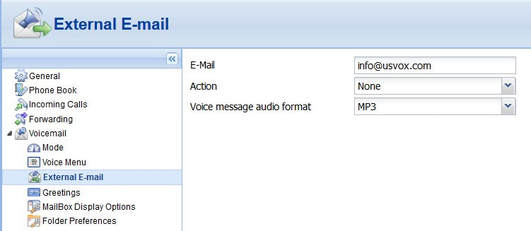
External E-mail allows you to forward messages to an external email box. When a new message arrives to your mailbox, a full copy of the message or simply a short notification can be sent to your other email address. To do this, specify an email address, define one of the actions (Forward, Forward as attachment, Copy, or Notify), choose an appropriate voice message audio format and click Save.
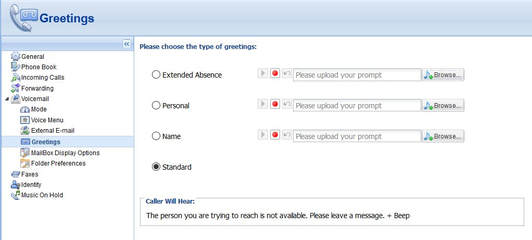
Greetings allows you to customize your personal greetings for your voicemail. The Standard option is set by default. You may upload or record greetings specifically for Extended Absence, Personal and Name.
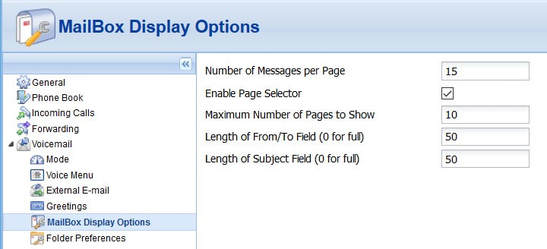
The Mailbox Display Options tab supplies with the following options:
- Number of Messages per Page –This defines the number of messages that will be shown in a given folder on a single page. If the folder contains more than this number, you will see “Previous” and “Next” links above and below the list, taking you directly to the previous or next message.
- Enable Page Selector –When you check this box, page numbers will be shown above and below the message list, allowing you to quickly jump to a specific message page.
- Maximum Number of Pages to Show – Defines the number of pages to be displayed above and below a message list.
- Length of From / To Field –Defines the number of characters that will be displayed in the From / To field. If you enter 0, then the full name will be visible.
- Length of Subject Field –Defines the number of characters that will be displayed in the subject field. If you input 0, then the full subject will be visible.
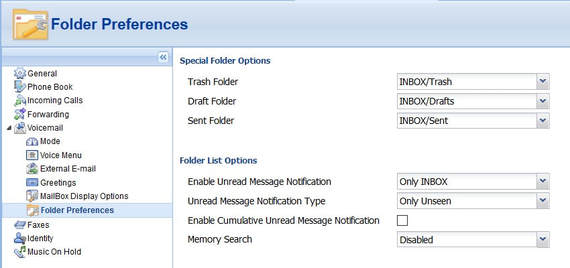
The Folder Preferences
- Trash Folder –Specifies which folder messages will go to when you delete them.
- Draft Folder –Specifies which folder messages you save as drafts will go to.
- Sent Folder –Specifies the folder where sent items are saved.
- Enable Unread Message Notification – This option specifies how to display unseen (unread) messages in the folder list in your browser window. If you set this to “No Notification”, you will not be notified of unseen messages. If you set it to “Only INBOX ”, the inbox heading will become bold when you have new messages, and a number will appear to the right of it indicating how many new messages are in it. If you set this to “All Folders”, the same will happen in all folders. If you notice that the folder list is loading very slowly, setting this to “Only INBOX” or “No Notification” should speed it up.
- Unread Message Notification Type – When new messages are in a folder, this option indicates whether to display the number of new messages only, or the total number of messages in that folder as well.
- Enable Cumulative Unread Message Notification – This controls the behavior of the message counter that is displayed next to each folder in the folder list. If the box is checked and the folder contains sub-folders, then once it is collapsed, the message count will include all of the messages within all of the sub-folders of that folder.
- Memory Search – If you search a mailbox, the search can be saved for quick access later. This option defines how many mailbox searches will be saved.
Setting voice mail by phone
by calling *98 from you extension phone or Press Voicemail button (Button with Envelope icon ‘if this feature is supported by the SIP phone’) the system plays a recording with quantity of voice massages and the option for personal options (Press 3) the system will give you the following options:
Administrator press 2
To Recorder Greeting 3
Administrator press 2
- Change password 1
- Change prom( greetings use on voice mail) level 3,
- To use the standard press1
- To use the Extended Absence 2
- To use the Rapid ‘Name’ press 3
- Date and Time announcement 4
- Press 1 to turn ON
- Press 2 to turn OFF
- Auto play 6
- Press 1 to turn ON
- Press 2 to turn OFF
- To Return to previous menu press *
To Recorder Greeting 3
- To Recorder Extended Extended Absence Greeting press 1
- To Recorder Personal Greeting press 2
- To Recorder the Name press 3
- To Return to previous menu press *
Faxes
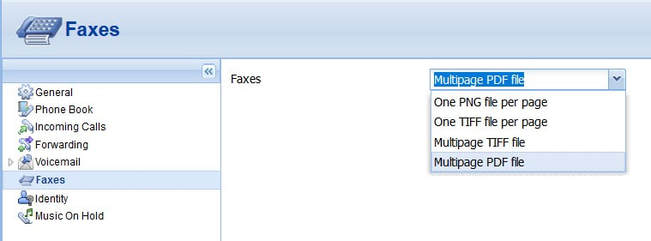
The Faxes tab gives you an opportunity to choose one of the output formats (one PNG file per page, one TIFF file per page, single TIFF file or single PDF file). To set the email receiving faxes please review ‘Voicemail-Mode and Voicemail-External E-mail’ setting.
Music on Hold
Here you can define which music will be used for calls on hold. To select music, click the Browse button, select an audio file and click Upload.
The music will be enabled within 10 minutes. Click the treble clef to enable / disable this feature.
The music will be enabled within 10 minutes. Click the treble clef to enable / disable this feature.
Desktop Softphone
New cloud-based solution enables VoIP users easily install and used Desktop Softphone application for both Windows and Mac computers.
Desktop Softphone for Windows
| mobyx.exe | |
| File Size: | 59522 kb |
| File Type: | exe |
Desktop Softphone for MacOS
| mobyx.pkg | |
| File Size: | 80870 kb |
| File Type: | pkg |

